December 07, 2025 | 5 min read
Welcome to the step-by-step guide for operating your check-in desk using Eventact Arrival! This blog post will walk you through the essential steps to manage guest arrivals and badge printing efficiently.
General
This guide is designed to explain the operations of an Arrival check-in desk at your event. It assumes you already have your physical desk set up, including the necessary hardware (like printers, computers, and scanners) and the Eventact Arrival software installed and ready to go. If you still need to set up your desk, please refer to the guide on "Setting up an Arrival Desk."
1. Login
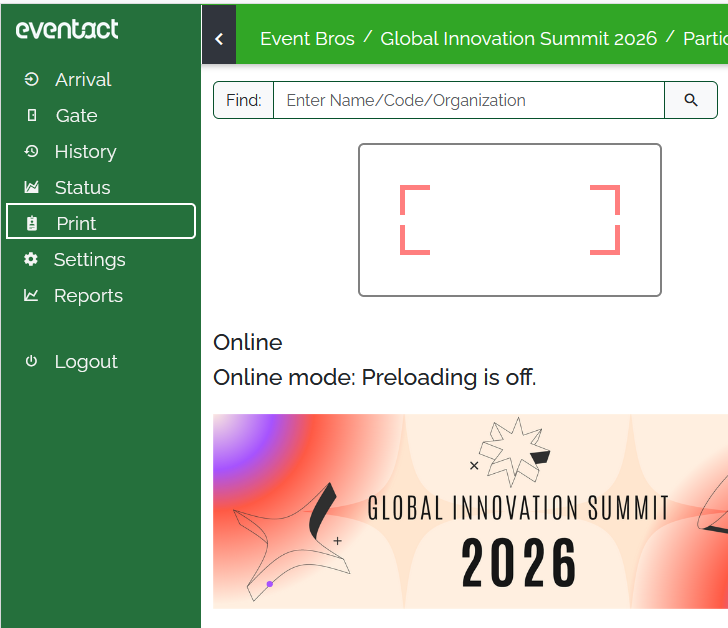
To begin, you need to log in to the Eventact Arrival application:
- Open the Eventact Arrival application on your check-in device.
- Enter your Username and Password. These credentials must be set up beforehand in the Eventact Backoffice system.
- In case of login troubles: first check the internet connection of the device, then contact the person who gave credentials. If you have access to the Backoffice, check your user - maybe the password is expired.
- Once logged in, you will be prompted to choose a Project (your specific event) to work on. Select the correct event to load the registrant data.

2. How to Print a Single Badge
The most frequent operation is checking in an individual guest and printing their badge. This is how you handle an arrival:
-
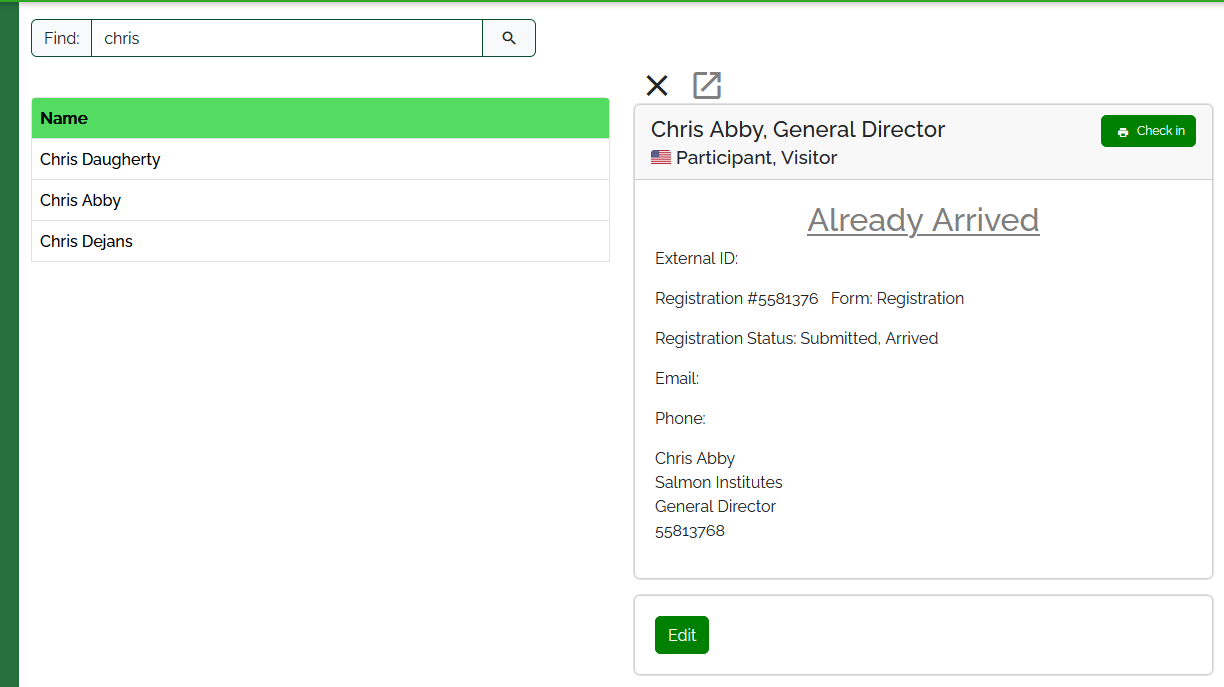
Identify the Guest: When a guest arrives, you can quickly find their registration record by:
- Scanning their e-ticket or QR code using a scanner connected to the desk.
- Starting to type their name, registration ID, or email address into the search field.
-
Select and Check-in:
- The Arrival screen will display the matched guest(s).
- Select the correct guest from the list.
- Check-in the guest within the system. This often happens automatically upon selection or with a single tap/click.
- Note: If you need to print the same badge again, you can enter the same registration number, name, or scan the same person QR code, the data will appear again and it will be possible to print a badge, although the status will be "already arrived".
- The system will then send the request to print the badge to the designated printer at your station.
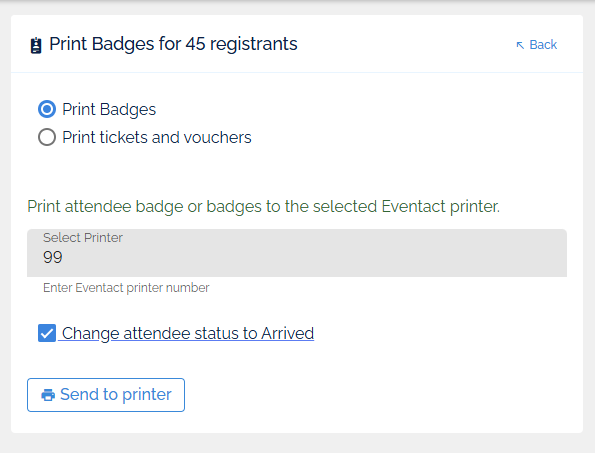
3. How to Print Badges for a Group
Sometimes, you need to print badges for an entire group (e.g., a company delegation, all speakers, or a specific registration type) to give to a coordinator for distribution. There are two primary ways to do this:
A. Printing from Eventact Arrival (Recommended for Desk Staff)
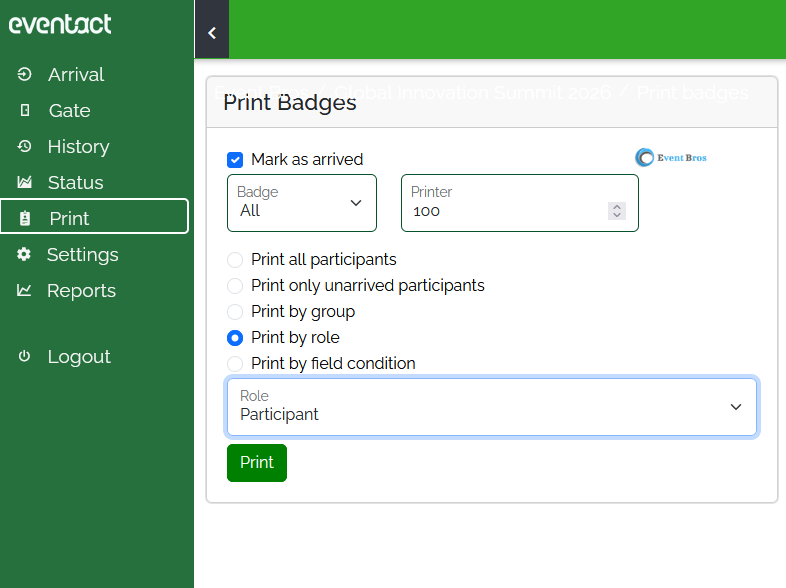
- In the Eventact Arrival application, navigate to the Print menu.
- Select the Filter Type (e.g., Company Name, Group ID, Registration Type).
- Enter or select the corresponding Value to filter (e.g., the company name "TechCorp" or the group "Speakers").
- In case of multiple templates, create groups for each template and choose the template when printing groups.
- The system will display the filtered list of registrants. Confirm the list and select the option Print All Badges for this group. The badges will be sent to the configured printer.
B. Printing from the Eventact Backoffice
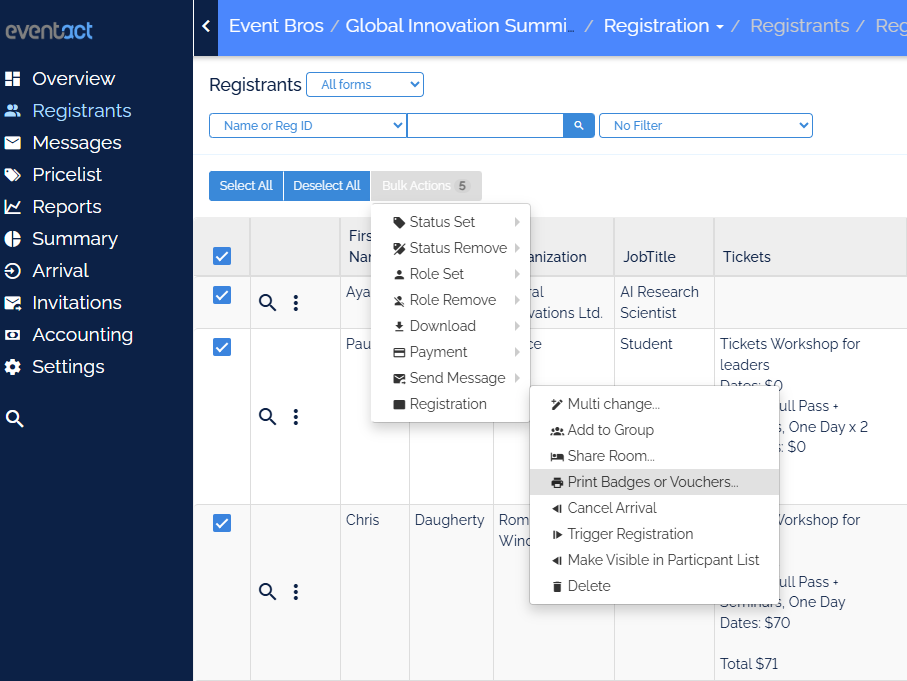
- Log in to the Eventact Backoffice system.
- Go to the Registrant List.
- Filter the guest list to include only the badges you need to print (e.g., filter by status, company, or group).
- Use the Bulk-Actions feature.
- Select Registration and then Print Badges.
- A prompt will appear. Enter the Printer ID to which you want to send the batch of badges (you must know the ID of the specific thermal printer).
- Click Print Badges to execute the bulk print job.
4. How to Replace the Sticker Rolls in a Thermal Transfer Printer (Example: Godex G-500)
Thermal transfer printers, like the Godex G-500 used for high-quality badge printing, require you to manage two main consumables: the badge stock (stickers/labels) and the ribbon.
- Open the Printer Cover: Lift the top cover of the Godex G-500.
- Remove the Used Roll: Locate the badge stock roll (the blank labels) and gently remove the cardboard tube or spool that held the used roll.
-
Load the New Roll:
- Take the new roll of badge stock.
- Thread the label stock through the guides inside the printer. Ensure the printing side of the labels is facing up (or as required by the printer model).
- Place the roll onto the holder/spindle, ensuring it's securely seated and centered.
- Secure the Media: Pull a small length of the label stock past the print head and close the media guides snugly against the edges of the labels to prevent skewing during printing.
- Test Print/Calibration: Close the printer cover and run a test print or a media calibration to ensure the printer recognizes the new label length and size correctly.

5. How to Replace the Ribbon in a Thermal Transfer Printer (Example: Godex G-500)
The thermal transfer ribbon is what transfers the ink onto the badge stock. When prints become faded or the ribbon is fully used, it needs replacement:
- Open the Printer Cover: Lift the top cover of the Godex G-500.
-
Remove Used Ribbon:
- Locate the two spools that hold the ribbon: the supply spool (holding the new/unused ribbon) and the take-up spool (holding the used ribbon).
- Carefully remove the spools/cores for the used ribbon and discard them.
-
Load the New Ribbon:
- Place the new ribbon roll onto the supply spool holder. Make sure the coated (ink) side of the ribbon is facing the label stock.
- Take the empty cardboard core (or a core from the previous set) and attach the beginning of the new ribbon to it. This will be your take-up spool.
- Place the take-up spool onto the take-up holder.
- Tension the Ribbon: Gently rotate the take-up spool manually to ensure the ribbon is taut and flat across the print head area.
- Close and Test: Close the printer cover. The printer may automatically calibrate. Run a test print to confirm the badge prints clearly and the ribbon is feeding correctly.

For general troubleshooting, printer issues, or badge printing errors, see the dedicated guide here: Eventact Check-in & Badges Troubleshooting.
Read more about the Eventact Check-in Software and Arrival App Prices.