Collecting Contact & Demographic Information
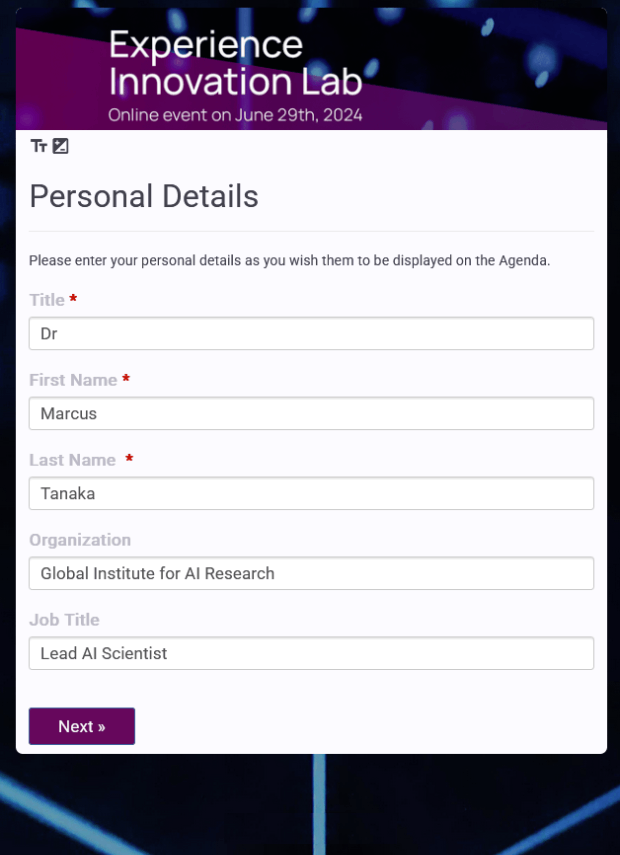
Submitters provide their contact details and other demographic data. Organizers can define exactly which fields are collected — such as professional level (e.g., student, early-career researcher, or senior scientist) — to support evaluation and communication.
Choosing Topic & Presentation Type
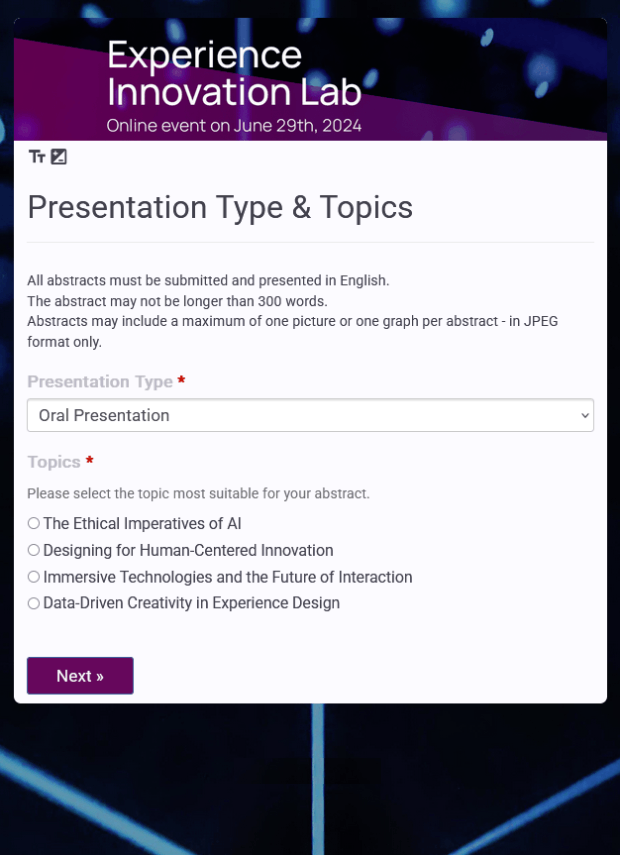
Submitters select the abstract topic and their preferred presentation type (e.g., oral, poster). Topics can be displayed in a simple list or grouped in a two-level structure (main topic + subtopic). Organizers define the available options to fit the event structure.
Tailored to Your Event
This demo shows just one way to configure the abstract submission process in Eventact.
Every part of the workflow can be tailored to your event’s needs.
Need help setting up your abstract submission process?
We’re here to assist—contact our support team to get started.
Overview - Flexible Submission Process
Eventact's abstract submission system is built for flexibility. Organizers can fully customize the submission form, define the workflow, and apply smart logic - like showing specific questions based on the abstract type or the submitter’s role.
Secure and Smart Login
Submitters begin by logging in with their email. If the system recognizes the email, they'll receive a secure verification code via email or SMS. This ensures their identity and allows Eventact to auto - fill known details from previous submissions or event activity.
Collecting Contact & Demographic Information
Submitters provide their contact details and other demographic data. Organizers can define exactly which fields are collected—such as professional level (e.g., student, early-career researcher, or senior scientist)—to support evaluation and communication.
Choosing Topic & Presentation Type
Submitters select the abstract topic and their preferred presentation type (e.g., oral, poster). Topics can be displayed in a simple list or grouped in a two-level structure (main topic + subtopic). Organizers define the available options to fit the event structure.
Adding Authors & Institutions
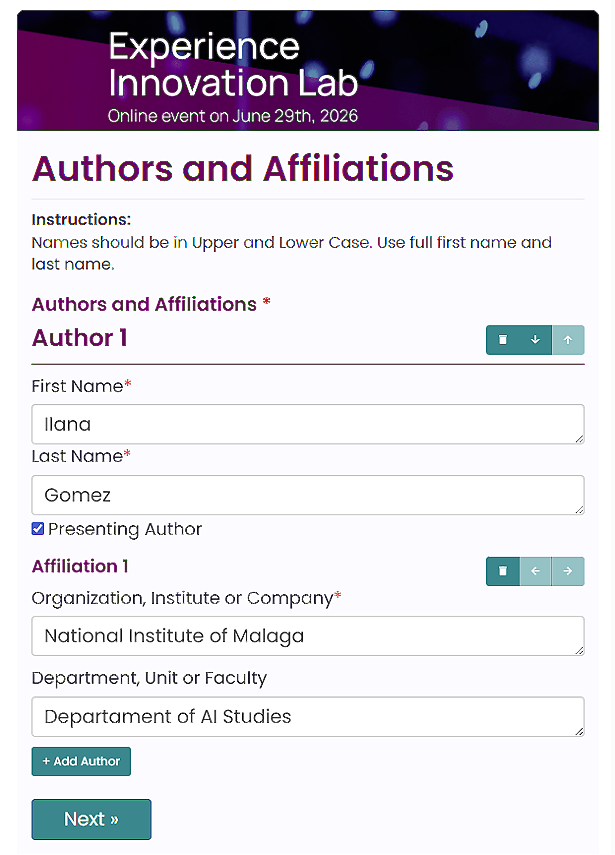
All contributing authors and their institutions are added. The presenter is identified, and organizers choose which fields are required for each author and affiliation.
Entering the Abstract
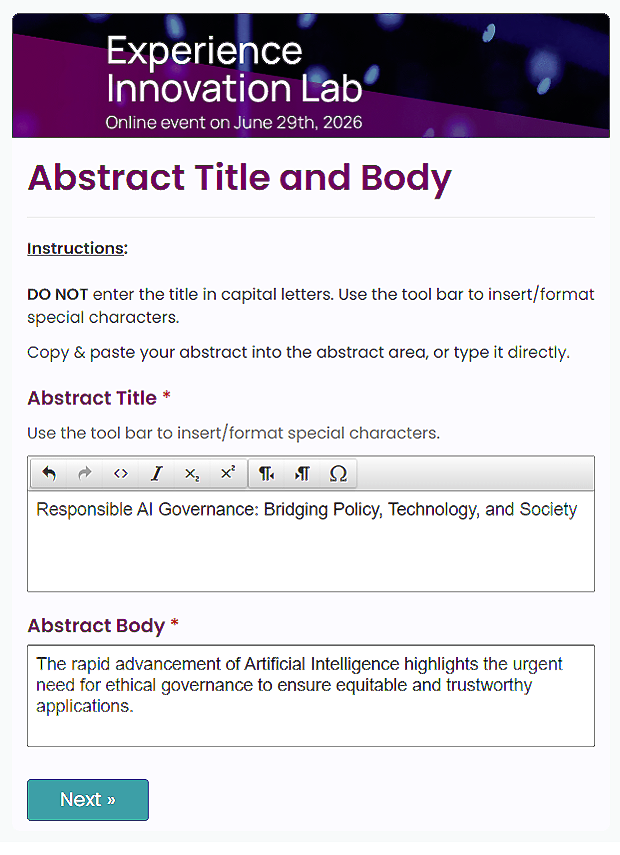
Submitters enter the abstract title, content, and any optional images or attachments. Organizers control the formatting options (bold, italics, etc.) and apply rules like word limits or section structure.
Preview Before Submission
Submitters can preview their abstract in a format that mirrors the final published version. This step helps ensure everything is correct before submission.
Confirmation
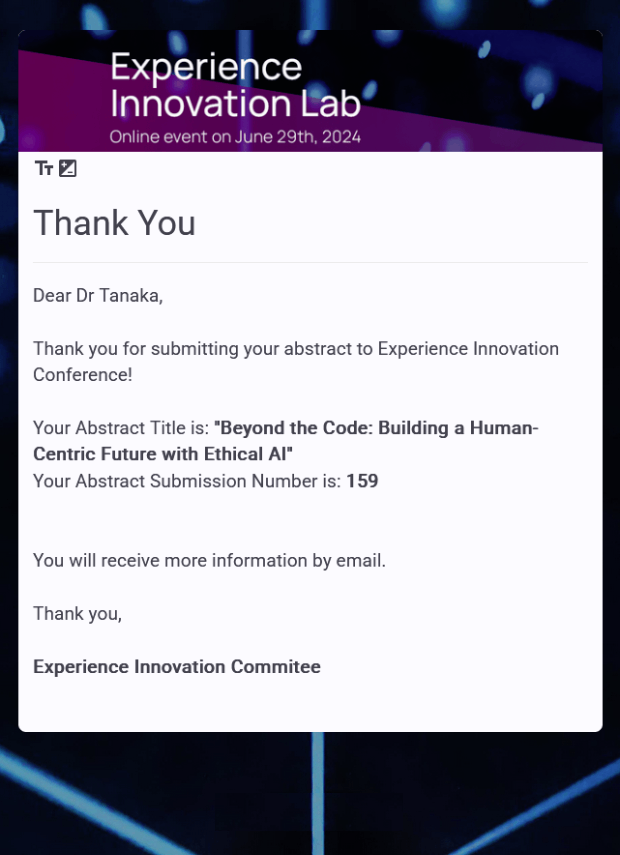
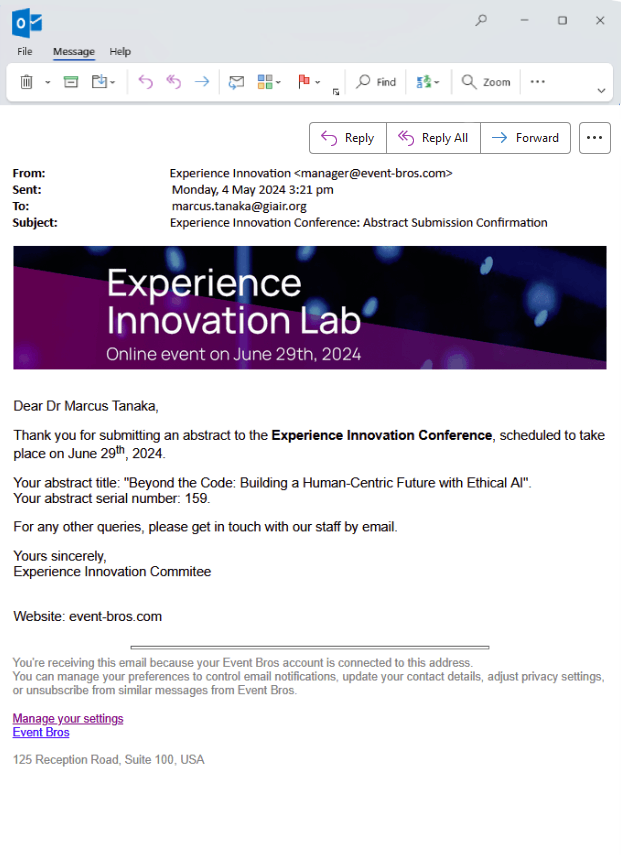
After submitting, users see a confirmation page with a unique submission ID and details about the next steps. A personalized confirmation email is sent automatically - both the message and email template are fully customizable.
Tailored to Your Event
This demo shows just one way to configure the abstract submission process in Eventact.
Every part of the workflow can be tailored to your event’s needs.
Need help setting up your abstract submission process?
We’re here to assist—contact our support team to get started.
